Winter Washi

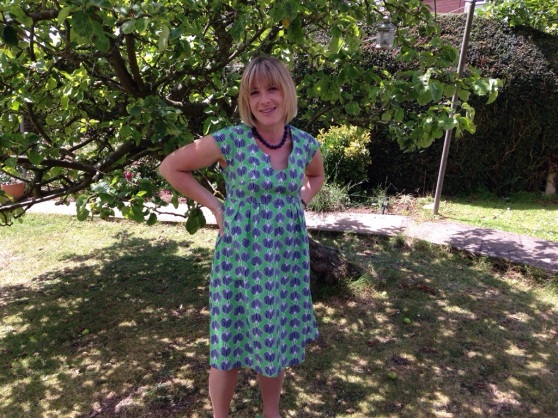
During a dig through my fabric cupboard last week I came out in cold sweat when I realised I still hadn’t used some of the fabric yardage I bought back in October. I’d bought it with the intention of making a winter washi dress. (I made one in July and LOVED wearing it so much!)

As I was about to order more yardage ahead of my husband’s next trip to New York, I thought I’d better get on with it – while it was still winter!

Making something a second time is just dreamy – especially when it was a good fit the first time. I got this made in a day. I just had enough fabric for 3/4 length sleeves but not long ones as planned. I got this dress out of 2 yards of Denise Schmidt Chicopee – witch was an incredible £3.90 a yard when I was across the pond in October.

This time I left the neck scooped rather than notched. I did a lined bodice – as per the tutorial here which was really easy and gave a great finish.

IMG_9926
I omitted the pockets (again – as with last time I ended up taking a good inch off the skirt on each side). The sleeves I used are the ones from the josephine pattern, as I felt the washi sleeves were a bit blousy for this fabric and again I didn’t have enough.

As with my previous dress it’s such a good fit and shape for me and it works really well with boots and a cardigan.

IMG_9929

IMG_9953

Family Quilt

As the evenings drew colder and darker last autumn my family said ‘We need more quilts!’ I needed no further prompting.

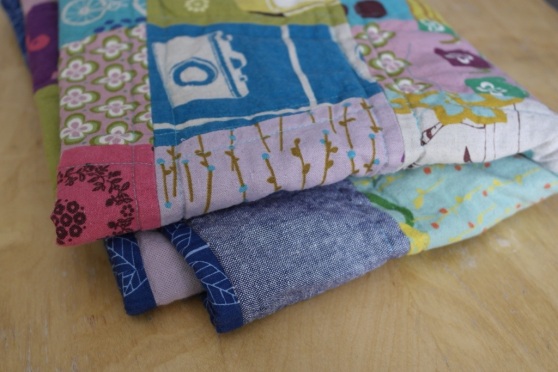
I decided on a nice simple Plus quilt and used the tutorial by Jenni here.  My fabric choices revolved around a rich -wintry theme and also the desire just to use all the lovely fabric that is now overflowing from my cupboard.  I chose a lot of my favourites, resisting the urge to hang onto them.  How much nicer is it to see your favourite fabrics in use rather than stacked in the cupboard?

This quilt design is simple to cut and simple to sew. The hardest bit is getting the lay out right. It took ages! I started mid-morning and knew I had to get it right and all the rows stacked and organised by the time I had to pick the kids up from school.  I managed it JUST!

I was hoping to get it finished and wrapped in time for christmas but all the other Christmas frenzy took over. I did finish it before new year. Boxing day was a PJ day and I quilted all day.

The backing fabric is the infamous ikea number fabric with a strip of Amy Butler dots – forgot to get a picture, my quilt holders were complaining too much!

It was my speediest and most trouble free quilt yet and I really enjoyed the whole process.

Here’s the photo shoot – with fingers!

2015/01/img_9712.jpg

2015/01/img_9718.jpg

2015/01/img_9720.jpg

Super Tote #2

Last summer I tackled a bag pattern called the Super Tote by Anna at Noodle-head. Her bag patterns are fab and I’ve made most of them over the last 3 years of sewing.

I had a little trouble with my bag which I moaned about at the time. Despite it being a tricky make and me making a bit of a pigs ear of making it, I did use it all summer.

So as winter approached I threw it in the wash and unfortunately it went in with something very blue….which sadly ran into the lovely yellow of my bag – making it a kind of muddy grungy green colour. Very sad. I tried lots of colour run removal washes and in the end decided on some weak bleach to try and lift the colour out. This did help a bit but it just doesn’t look very good any more.

So…..time for another Super Tote I thought. My sew-jo has been flowing well over Christmas so just after new year I thought I’d give it a try.

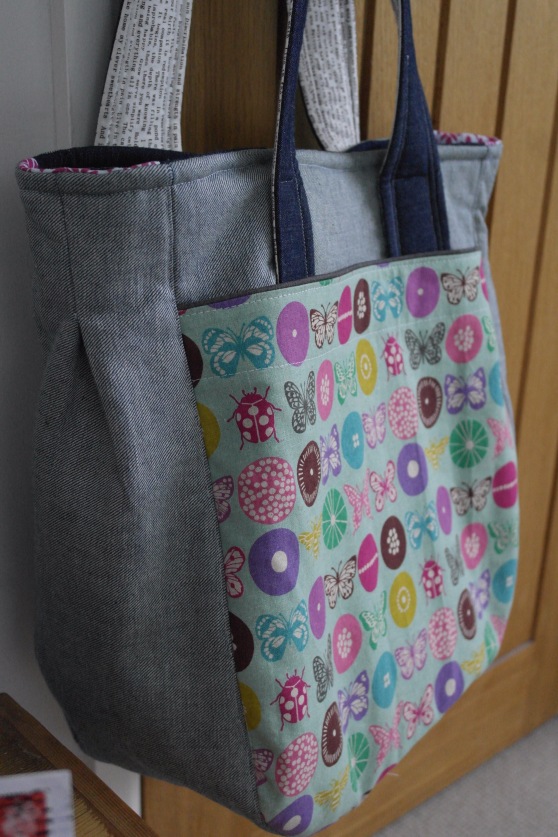
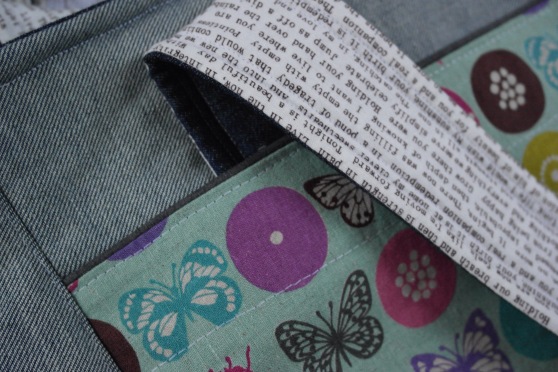
The fabric I used was all from my stash. The main body is inside-out denim (left over from my Dad’s apron and my ovenglove-a-thon) with some lighter denim for the straps and zip bits. I cut into a very precious fat quarter of Kokka linen for the main pocket.

Here are some of the things I did differently this time: (skip this bit if you aren’t intending to sew one!)

* read the pattern properly! last time I didn’t realise I had to stitch the straps to the top of the bag outer, which meant it was all a funny shape and flopped over. In my defence it’s easy to miss this bit in the instructions.

*I chose the same fabric for the bag outer all the way up (and behind the straps) – last time I had 2 different fabrics, which meant when the bag was picked up you could see the different fabric poking out from behind the outer pocket.

*I did a front pocket with a facing piece rather than a fully lined pocket and I added piping this time, which I love the look of. For some inspiring piping see Mary’s Super Tote

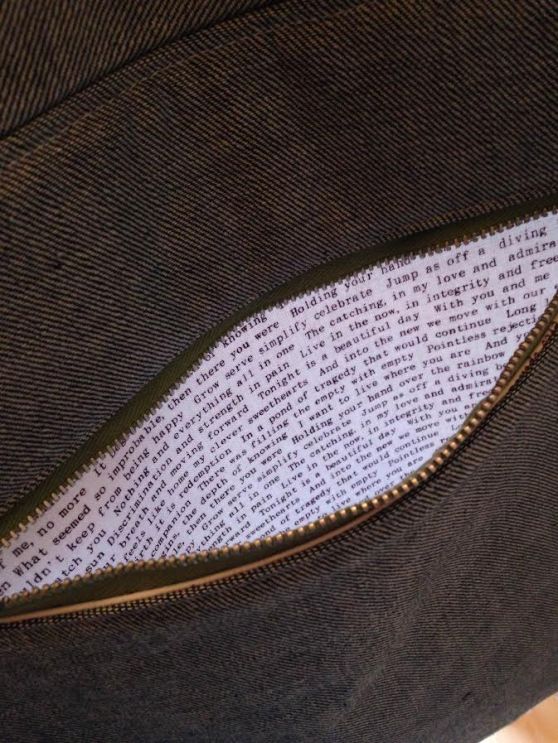
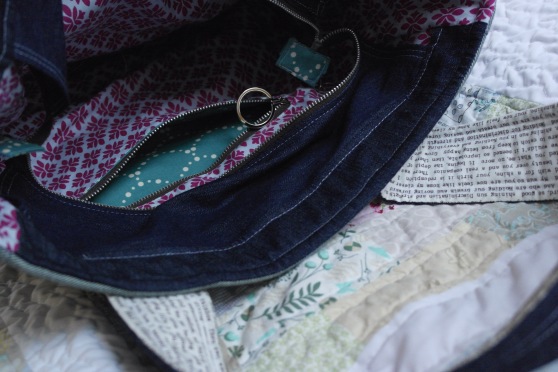
*I added a zip pocket inside the front pocket (confused!?). I used the front pocket a lot for my phone last time but found the little slip pocket that I added was too high up and when I bent over my phone fell out! So this time it’s nice and secure and it’s a lovely text-print lining.

unnamed (1)

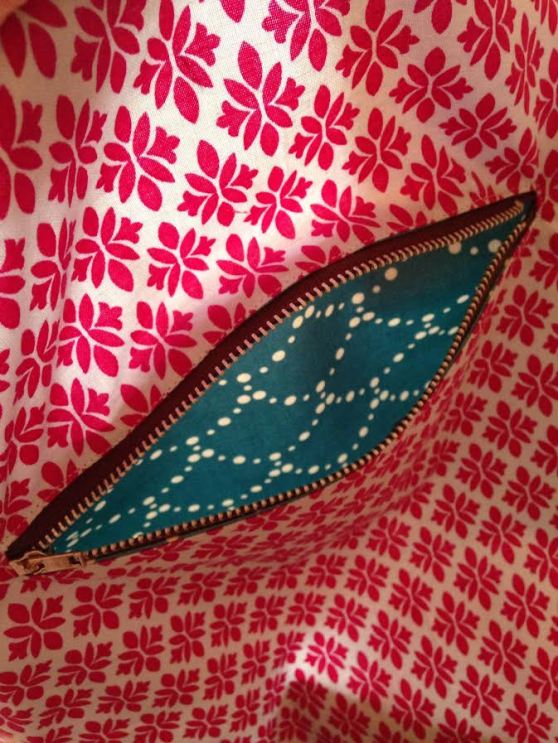
*I added a zip pocket inside the main lining. Again I didn’t bother with the elasticated pockets as per the pattern, as I knew it would be very unlikely that I’d take the time to put things in the right places. As it’s a big bag I decided that one pocket would be useful for lip-balms and other small items to cut down on rummaging time.

unnamed

*when attaching the gusset I clipped the curve on both pieces of fabric – the gusset and main lining piece, this made it WAY easier to attach. Last time I just clipped the straight piece.

*I interfaced the main bag body and straps with fusible fleece. This was quite bulky to sew but gave a much better and more sturdy finish than the woven interfacing I used last time. Its a heavy bag and it needs a lot of structure to make the shape work.

So in conclusion – it’s worth having another go at a tricky pattern. I totally love and am very happy with this one. Here are some photos.

/home/wpcom/public_html/wp-content/blogs.dir/6a7/41254634/files/2015/01/img_9664.jpg

/home/wpcom/public_html/wp-content/blogs.dir/6a7/41254634/files/2015/01/img_9666.jpg

/home/wpcom/public_html/wp-content/blogs.dir/6a7/41254634/files/2015/01/img_9667.jpg

/home/wpcom/public_html/wp-content/blogs.dir/6a7/41254634/files/2015/01/img_9670.jpg

/home/wpcom/public_html/wp-content/blogs.dir/6a7/41254634/files/2015/01/img_9673.jpg

September Sewing

I’ve never quite got in the swing of doing a monthly round up of sewing projects (some months there aren’t really many!) but I have a few things to share and it just so happens to be the end of the month, so here goes!

First up is this pencil roll, which I made for a 7th birthday party my youngest was going to. A very nice simple make – apart from all those pencil slots, which seemed to take an age. I took my measurements from here but added elastic and a button instead of the ribbon tie.

IMG_8518.JPG

IMG_8519.JPG

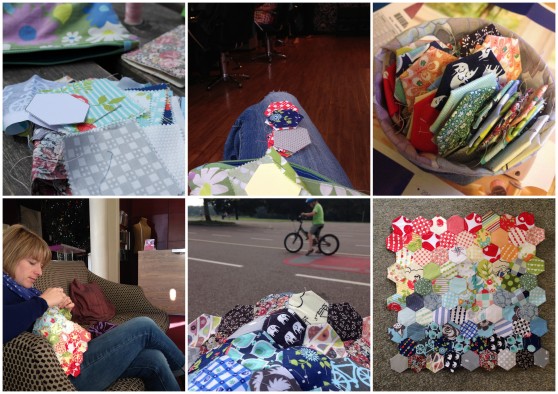
My other finish is the result of a hand sewing project which I started last summer. It started off a as a quick grab of random scraps before heading off to a festival last August, then accompanied me on many trips away in various states of finished-ness all year.

Sept 14

As the hexie fabric was a bit of a random selection I decided to make them in to a rainbow so create a more striking look.

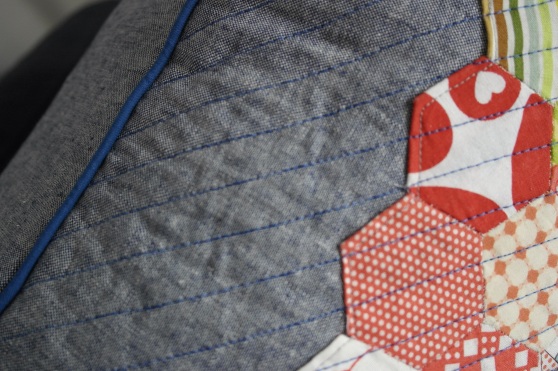
I finally sewed on the last row of hexies this summer and made it into a cushion. I used some Essex linen which I bought from America (ironically!) ages ago. I used some to border my coffee table quilt.  I also managed to do my best concealed zip insertion yet – can you see it?

unnamed (1)

I quilted all over of it with dark blue Aurifil thread – not sure if that was the right thing to do but at least it will keep my hexagon stitches from undoing!  I opted for piping round the edge, which I prefer to a quilt-type bound edge. I opted again for navy blue, which really frames the rainbow of the hexies.  I really love this bright addition to our muted living room (although its getting less and less muted the more I sew!) it’s a lovely bit squishy size and full of the memories of all the places spent sewing it.

Oh yes…pictures!

IMG_8532.JPGIMG_8535.JPG

A Very Special Quilt

I started this quilt in earnest back in March. In fact the idea and initial cutting spree (until I got bored) was at Christmas last year. So it’s been almost a year-long project, with a the goal of being my Mum’s 70th birthday present.

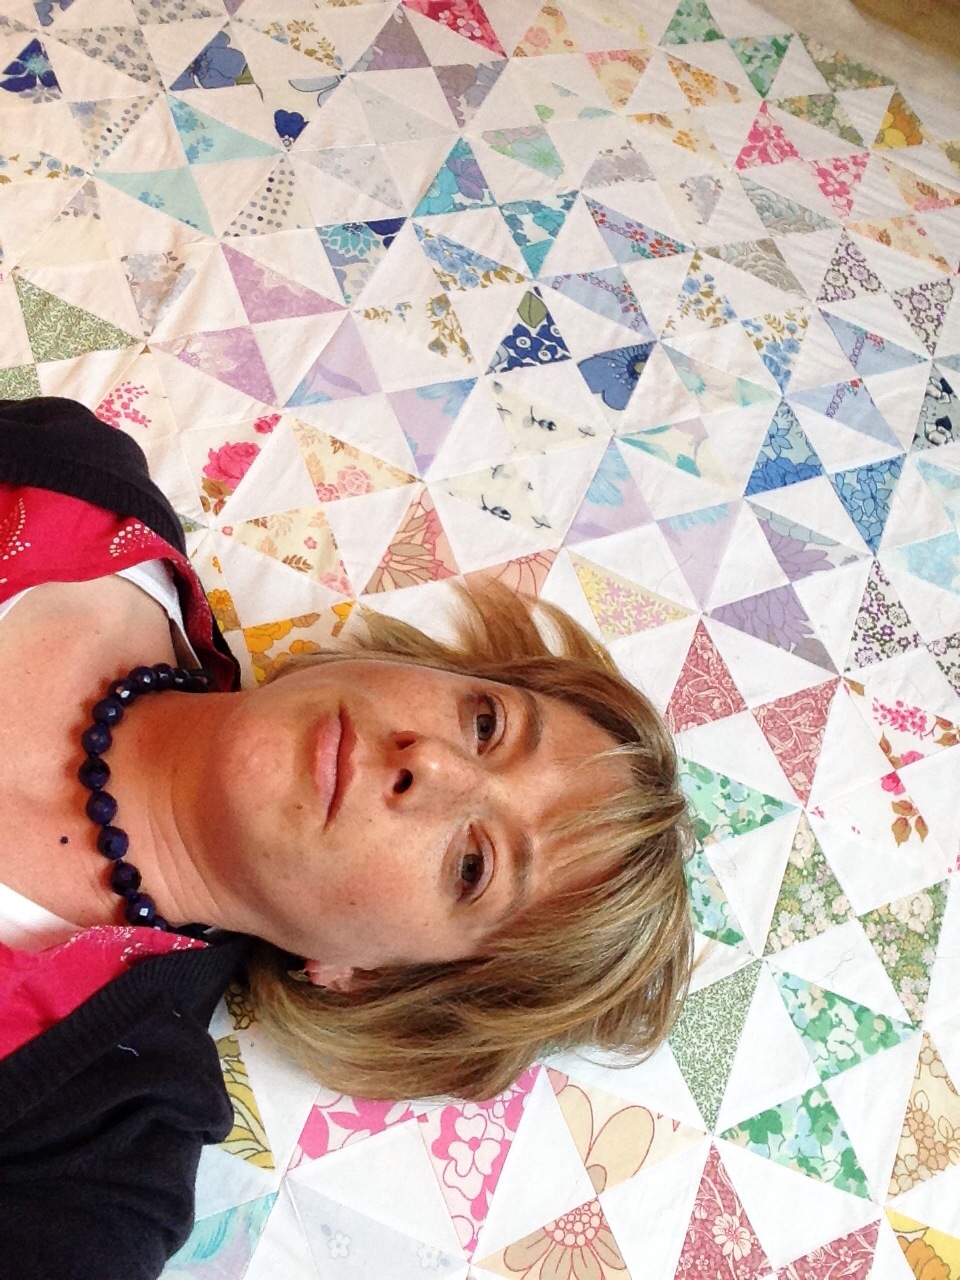
I wanted to make something with the vintage sheet fat quarters I got through a swap and I knew that some of these prints would be wonderfully nostalgic to my mum.

I settled on the hourglass block after seeing Rita’s hourglass quilt and tutorial.
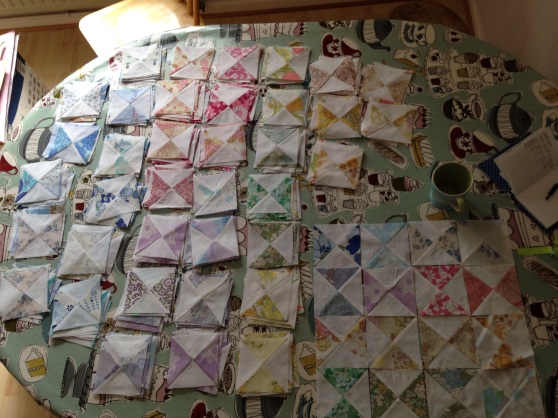
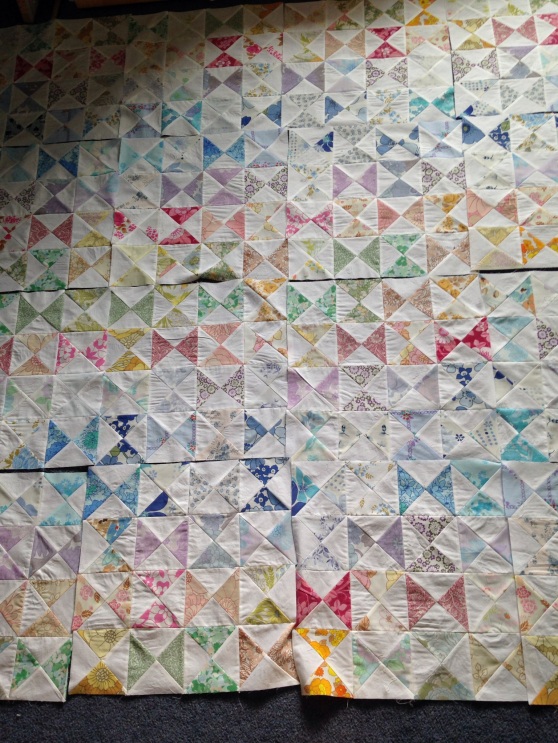
This is a double quilt, so there were a lot to make – 200 and something! (I guess I could have made them bigger!) I found a very handy labour saving half square triangle ruler on Amazon, which did help a lot.

IMG_6908.JPG

and then to start sewing them all together. There were even some perfect points!

IMG_6922.JPG


Then I sewed them into blocks of 12 in a rainbow-ish colour sequence


IMG_6934.JPG

There was some basting agony (isn’t there always?!)

IMG_6977.JPG

After our holiday to France and my sewing machine had made a trip back to the mothership for some attention, it was time to quilt!
I chose to do my favourite orange peel quilting. The curvy lines really helped break up the geometric look of the blocks and create these lovely flowers.

IMG_8373

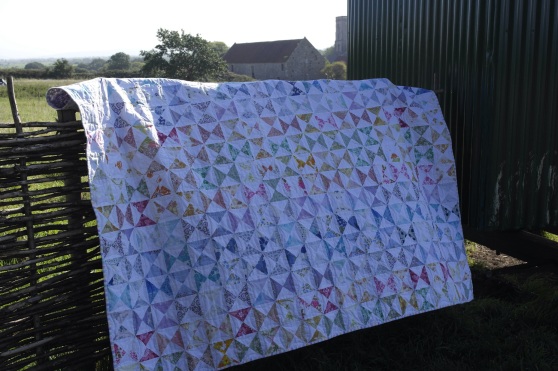
And then with the addition of some lovely vintage stripy binding (which you can buy here!) it was finished (yes the backing fabric is a very funky vintage sheet!)

IMG_8376

My husband and I had a lovely couple of days in a Shepherds Hut in Somerset while the kids were my mum’s. This was the perfect chance to hand stitch on the binding in the cosy hut with the woodburner and enjoying the last evenings of summer. It was also perfect for photographs.

IMG_8378

IMG_8384

Today was her birthday and we presented her quilt, she was really thrilled  with it and says she can’t wait to put in on her bed!

SAMSUNG CSC

I feel a bit sad now it’s gone!

A Sewing Personal Best

I’ve been meaning to make a new beach bag since last summer and finally with the impending school break and a holiday booked, I got round to it.

Our old bag (shown below) was bought in a French supermarket many moons ago so definitely time for an upgrade.

I thought about buying a beach bag pattern I’d seen doing the rounds but with a long list of dressmaking patterns I’d like to buy, I decided I could manage without.

I used the old bag as my size guide and dug out this lovely ikea bird fabric, which is a nice home decor weight.

The handles were the ones from my Supertote which I made too short and I used Lisa Lam’s very nice clear zip pocket tutorial.

This was a super-fast make I think I started late morning and it was all done by school pick up (I’m not the speediest sewist!) and more amazing than anything I didn’t pick up my seam ripper once! That really is a first.

It’s huge with plenty of room for all our beach clobber. I’m looking forward to trying it out very soon as we are counting down the days until the end of term now!

20140715-152526-55526589.jpg

20140715-152604-55564678.jpg

20140715-154917-56957717.jpg

20140715-154916-56956713.jpg

the sun has got his hat on….

We are having a pretty nice summer in England so far, so more summer wardrobe sewing has been happening.

A little update on my first sugar pop top…I made another! This time I was brave and used some of the fabric my husband brought back from the USA. This fabric is Flea Market Fancy, posie in grey. It’s a lovely retro print and I do love grey (though my wardrobe is becoming all kinds of colourful at the moment).

After not being happy with the bust darts last time, I traced the ones from the Josephine top pattern, this worked a treat. I cut a small size this time but scooped out a bit more round the arm holes. I’ve worn it loads. I do see why people avoid using quilting cottons for dress making, it is quite heavy compared with some of the other fabrics I’ve used.

Here it is still in need of hemming.

20140715-132710-48430438.jpg


20140715-132709-48429361.jpg


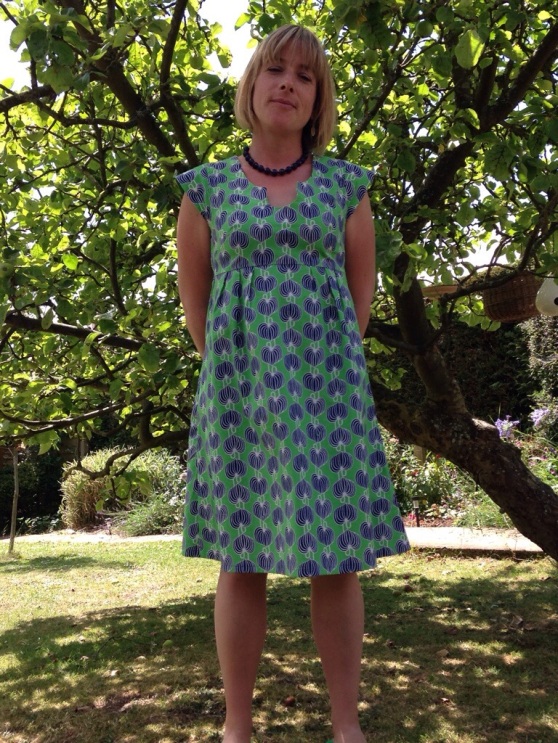
My next make, hot off the press, is a Washi dress. Another fab pattern by Made by Rae. It’s a dream to wear and should cover up my French bread excess in a few weeks. I was inspired by seeing Joanne’s version and hearing her rave about it . I decided right away that my bright green Chinese Lantern fabric would he perfect.  To be honest there are so many amazing versions of this dress all over the sewing-web, its not hard to feel inspired.

A few things to remember for next time…

  • The shiring at the back was a of a test of patience as my machine really didn’t like having elastic in it’s bobbin! .
  • I decided to ditch the pockets in favour of a more streamlined skirt.
  • I’m not over the moon with the U shape at the front. It’s a bit stiff and sticks out. I may go for the scoop neck next time (which I see Joanne has done too!)
  • The top half is a bit roomier than I’d like, but as this will be a summer dress, that’s probably not a bad thing.  I went for a conservative half way house between small and medium – but I think a small would be fine, there is quite a bit of give across the shoulders (which is the bit that’s always tight on me) thanks to the shiring and the arm holes are generous.

So here I am swishing about in the garden. Thanks to my husband for tearing himself away from work to take the photos (I did make him lunch as a bribe!)

20140715-132711-48431359.jpg


20140715-132712-48432288.jpg


20140715-132713-48433269.jpg


The Whole 15 Yards

My husband travels to the good old U.S of A at least twice a year, which for me is a great chance to stock up on fabric!

The first few times I let him choose for me. This had mixed success and mostly he’s too busy to go fabric shopping while he’s away, so the process has become more refined over time.

In February he was in New York and I placed an order for him to go and collect from a local store, which had an etsy store too. This worked brilliantly until he mentioned the cab fare there was over $20. I figured I may as well just get stuff shipped straight to his hotel!

So this time I did just that. The only problem was the overwhelming choice of online fabric shops in the U.S. Where to start!?

I wanted yardage for dressmaking but quilting cottons rather than anything too specialised. I went for an etsy store again as i find them easy to browse and clear to see what you are playing for. Rock Paper Scissors in New Jersey had a really nice selection of prints and they were really helpful with my odd request to ship to a hotel address.

Choosing was very hard. I had a list of garments on my sewing to do list, so I tried to choose yardage and prints to match this list. I got a whopping 15 yards at only $12 shipping. A few half yards may have snuck in there too – just to fill up the box of course!

20140616-124422-45862231.jpg

My choices are were pretty good in real life – the bottom one – green Chinese lanterns  at the bottom is VERY green, not sure about that for a top now, it may become a skirt instead. The blue floral is a lawn. I can’t wait to get sewing. First on my list is the Sugar Pop top by Sew Caroline. I must get on with it while the sun is still shining.

Troublesome Tote

I’ve just finished making the Super Tote bag by Anna at Noodlehead. I’ve made a number of her bags in the past (The Go Anywhere bag and a couple of Sidekick Totes here and here). I bought the Supertote pattern AGES ago when there was a bit of a sale on and not having made a bag for nearly a year I thought I’d finally give it a go. I spent a while browsing other peoples efforts and read a few reviews, which gave me some helpful pointers about inside pockets and fabric choices.

As a lot of people say, it’s not a quick make, there are some fiddly bits like getting the gusset pinned and stitched in on both the outer and lining. If you have a bit of bag making experience under your belt it’s a pretty straight forward make.

…Except…. I had a few of my own troubles with this bag.  Some were my own doing – like miscalculating the handle length (remember they don’t start at the top of the bag!). Other problems….well, who knows….

My first irritation was that the front pocket didn’t quite cover the green lining fabric underneath (see photo below). This is because I opted to make the lined pocket and sewing outer and lining together means you loose a little length on the pocket. This just bugged me. So I unpicked the binding (which I did instead of piping) interfaced it and stitched it so it sat higher up.  There was no way I was unpicking all that curved gusset again! Fixed ( or so I thought).


20140613-144536-53136871.jpg

Secondly…I was rather disappointed that the recessed zip pieces were left with raw edges on the inside of the bag. I would like to have seen these with a double fold, so at least they didn’t look so scruffy. They are inside but actually you see then quite a lot when the zip section flops about., next time I would cut these pieces a bit longer so that I can fold them neatly under

So onto my next point and I only realised this when I was finished. The zip part (which I made from heavy denim – so could have been part of the problem) is all very loose and floppy. The zip tab ends fall down inside the bag making it a real fiddle to open and close the bag. I really wasn’t happy with the final finish and after wrangling over it for nearly a week (on and off) I was a bit miffed to say the least. Not one to admit defeat, after sleeping on it I came up with a solution…..

I put an extra line of stitches along the recessed zipper (see photos below)  this made everything much more secure and helped the zip sit much higher in the bag. I thought it might stop the top section of the bag from being so floppy (another irritation after all that interfacing!)

20140613-144540-53140084.jpg

20140613-144540-53140932.jpg

I also hand stitched my zip tabs into the bag lining, so they didn’t keep disappearing, this worked really well and I’m quite happy with the whole zip arrangement now.  A shorter zip might help this problem too.

20140613-144539-53139225.jpg

Do you remember me mentioning that front pocket binding and how I spent ages getting it to cover the green lining?  Well low and behold when you put stuff in your bag it all goes a bit pear shaped and all that hard work counts for nothing!  The photo below shows it in action -( it actually doesn’t look too bad in this photo but rest assured it is) –  can you see how the handles are pulling the green lining up and distorting it all?

20140613-144541-53141863.jpg

So what lesson can I take from this bag making adventure?  Don’t over cook the details on a bag you’ve not made before – it may all be for nothing if you don’t like the finished result!

All that said – I think I do like it, I LOVE the fabric and it’s really comfortable to carry and will be great for the summer holidays to lob stuff in. I’m just mightily disappointed at the loss of form and shape once it’s full of stuff. I certainly don’t remember seeing any photos on my search of flikr and pinterst that looked like my bag…so maybe I’m the only one.

I’d love to hear from anyone else who’s found this with their Super Tote.

Additional info November 2014: I realised after speaking to a friend who had also made a super tote, that I hadn’t attached my handles properly! They need to be stitched onto the top of the bag.

Somehow I missed this in the instructions.

Now I’ve done this the bag doesn’t flop around so much at the top and the zip section sits better without the need for the extra line of stitching I added.

Even with all mistakes I made with the pattern, I used it all summer and I will definitely be making another (following the inductions better this time!)

Tumbler

When I went a away on my sewing weekend, I decided to make a covering for our living room coffee table. It’s an ancient Ikea table that has seen a lot of action and to be honest needs covering up! Its quite big so it usually just ends up covered in junk.

During the Great UK Fabric De-stash, I bought bag of precut charms. I was delighted to find the bag contained about one third Kokka Japanese linen. They are absolutely divine.

I trimmed as little as I could to turn the charm squares into tumbler shapes.

I added a border of Essex linen The backing is some dusky pink linen I bought from my local fabric shop. Its the perfect match in its muted-ness (is that a word!?)

My husband suggested a dark blue binding to complement the Essex linen. He’s good with colour my husband!

So here it is in situ and out in the garden – also being photo bombed by the cat!

I totally love how it turned out. The colours are just up my street!

20140318-202450.jpg

20140318-202521.jpg

20140318-202755.jpg